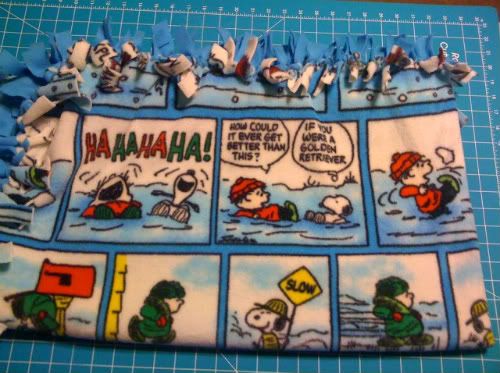
I make blankets. Not your everyday blankets, but fleece tied blankets. A former co-worker shared her knowledge and taught me the ways of blanketology. Ever since then I've been a lost cause. I make them every Christmas, sometimes for birthday presents and always for a baby shower gift. They are easy, affordable and one way I can be amazingly creative without stressing out.
I find myself not only making tied blankets for family, friends and co-workers, but also teaching others how to make them. It's not quite a mission, but pretty darn close. I am proud that practically none of my blanket's waste material goes to waste. I recycle all parts of my blanket so that very little is tossed.
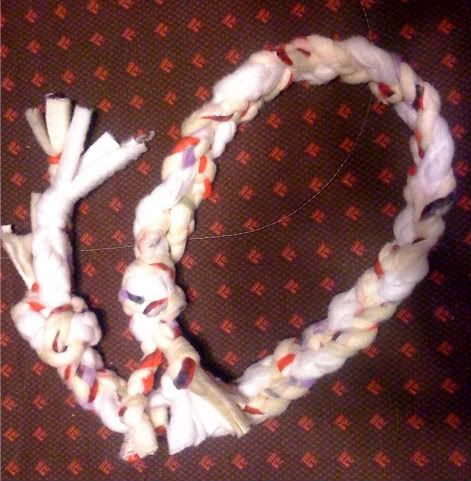
I trim the sides of the fleece material for the reinforced edging to make a smoother tie trim. I reuse those clipped sides and braid them, tying knots at each end, into cat toys.

The four or five inch material four corners that I cut out, I save and use to make a crazy quilt. It shows a touch of the fabric for every blanket I've ever made. It's a fabric trip down memory lane. I love it.
Making the blankets is incredibly easy. I use 1/2 yard in length for wheelchair blankets and car seat blankets, 1 yard for baby blankets or short humans and 2 yards and up for adults. That measurement is doubled. For example, for a 1 yard blanket, you need two separately cut 1 yard pieces of fabric. One yard is for the top and one yard is for the bottom.
You can use patterns on one side and a complimentary solid color on the other side. Or you can use the same pattern on both sides, or a different pattern on each side. There are no limits to your creativity.
You lay down one piece of material on the floor. (It's easier to pin it up with lots of room. If you have cats, remove them from the area, they always want to sit in the middle of your material because they LOVE fleece and bugging the heck out of you.) Lay the second piece of material over the top of the first. Match them up on all angles. If you have overage, trim the material edges to match. You basically want two pieces of materials that mirror each other in width and length.
Get out your straight pins and ruler. Measure in four or five inches (whatever measurement you want, just be consistent) and start pinning the pins to be your guide. Edge the whole blanket, four or five inches in with pins. Your corners should be either four by four or five by five, again whatever you decide. You will cut out the each of the corners first, set aside to sew together later for your crazy quilt blanket.
At this point, your blanket is evenly trimmed, completely pinned and corners cut. You then can take the blanket and set it across your lap. Get your scissors and begin cutting the fringe that you will double knot (this makes the tied part of the blanket). You cut about one inch apart, to the four or five inch pinned mark. Then you tie the top and bottom cut material into a double knot, going along the all sides of the blanket. Before you know it, viola, you are done and have a finished blanket.
There are a multitude of step-by-step videos out there for those who don't quite understand my instructions. It won't hurt my feelings for you to check them out. But remember, there are many ways to do this blanket, but the underlying theme---no sewing involved.
I think once you make one, you, too, will be hooked on it. If you make one, send me a photo. I'd love to see them.
Thank you! You just decided what our Maj.'s twin girls are getting for a farewell present when they PCS next month :).
ReplyDeleteTracy